CKV: The Legacy of “Half-Pint”

LIW5

I have already discussed the importance of visual aids during a presentation. Not only does it reinforce material, it also engages and intrigues students. Furthermore, it beneficial to the presenter as well. To make a presentation, the presenter needs to familiar, organized and knowledgeable with the material. By creating a presentation instead of a paper, the presenter is required to repeatedly look and adjust to the material.

imovie5I have already experimented  with the (free!) iMovie app when I did my trailer. [Check out my trailer and previous post reviewing it] The trailer was simple and successful. This week, I experimented with the movie portion of the app. The movie creation varied significantly from the itrailer; however, it didn’t cause any difficulty or need any prior experience as I expected. The movie created introduced the best selling author, Laura Ingalls Wilder. It was created for the purpose to Celebrate Kansas. This is website that honors Kansas past and elements. I choose to highlight the well-known author because her books are revered and represents the time period of settling in the frontier. Like many other children and adults, I loved her books. In fact, they were the ones that determined my favorite genre: historical fiction. I feel like she should be represented in Kansas history because she recounts an important period. Here is my mini movie, titled “The Legacy of Half Pint“. It recounts her life and recognizes her legacy. [For those who aren’t familiar with the books, Half-Pint was her nickname by Papa]

 https://www.youtube.com/watch?v=9ju25BnpAA0
 

LIW

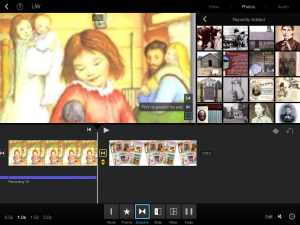
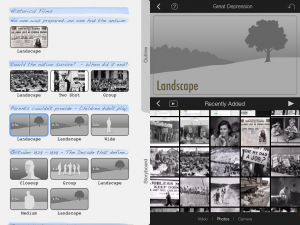
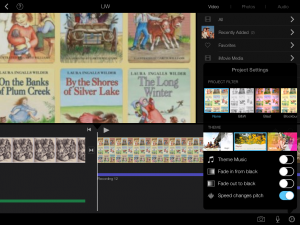
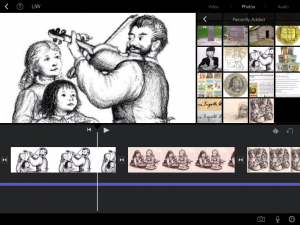
LIW4 To begin, I selected the theme of movie. Afterwards, I was directed to a black screen and a timeline where I could insert audio, video and photos. I began with my photos. I had selected several photos previous to starting, so I accessed my photo library. But I also had the option of capturing a photo or iMovie library and iCloud Drive. Once I selected my photo(s), their thumbnails appeared on the timeline below the screen. I could adjust the time they were displayed by moving the ends or picking it up and moving it to place desired.  In addition, alter the beginning and end position of each. Filters and overlying text options were also available. Afterward, I began on my dialogue. I selected the microphone in thee bottom right corner and clicked “record”. It gave me a count from three before I began recording. When I was finished, I could review my recording, redo it immediately or cancel it. The recording time was displayed on the timeline as a blue bar. Similarly to the photo length, I could adjust and move my recording as I saw fit. Lastly, I worked on the transitions. There were several options of how each picture moved into the next. Here is a tutorial with additional help.


LIW2 LIW3

The process took longer than the trailer but not as long as I expected. Once I got the hang of the process and understood how I wanted my movie to end, it was pretty simple. However, I was not impressed with the background audio. I was interested in selecting some background music for several pictures that didn’t need dialogue and I wanted to insert a default theme music. However, I could adjust it or remove it from the times I recorded my dialogue. Other than that I was overall pleased with the app and how my movie turned out. I wish everyone else good luck and encourage using short personal videos in the classroom.
Week 5: Tech Edge in the Classroom


techedge   techedg11

Apps are useful in all subjects, ranging from reading to math. Both engaging and instructional. The benefits of iPads in the classroom is that they are interactive, mobile, graphic and visual Here are a few recommended apps by tech edge. You can the Youtube channel, Tech edge, to receive weekly app/technology recommendations and reviews.

Episode 91: practice math are helpful in all levels of mathematics.

techedge1  techedge4techedge2techedg3

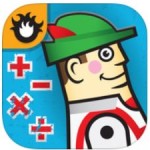
Math duel is an app that allows students to work together and practice at their own level. It is an interactive game that ignites friendly competition. The next math app recommended is IXLmath is an app that is available and useful for all ages in math. All levels of math from telling time to algebra is available on this app. In addition, the app aligns the quizzes with standards of that specific math element.  The students are presented a variety of answers corresponding to the math level. The app offers a timed aspect to help teachers assess the understanding of the students. After the questions are answered, the app provides explain actions and additional exercise for the students to review if they got a question incorrect. Deep see duel app requires students to choose three cards out of nine to add to the given sum. Finally, the yodel oh – math mountain app. Again, the math app provides a wide array of math practices. The students will need to choose the correct answer to the math prompt. With each correct answer the yodels moves up the mountain. The longer the student takes to answer the question, the farther the guy slides down the mountain.

Episode 154: sight and spelling words can definitely strengthen English and reading skills.

techedge5techedg6techedge7

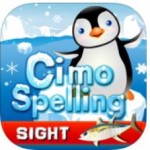
The first recommended app was cimo spelling. It involves the a penguin crossing a ice bridge to get food. The ice bridge is made up of blocks of ice representing letters. The student is responsible of dragging and placing each ice block with the letter in the correct order to create the word. If one letter is incorrect, the penguin falls through the ice and the student is given another try, starting at the incorrect letter. The spelling test  free app is an app that allows students and teacher sot create a virtual spelling test. The teacher inserts a word and records them self saying the words. Then the student can hear the word, multiple time if needed, before writing the word in the blank. The app allows others to share their tests and presents student’s past test scores. Sight words app reinforces recognition [this is google play app, not iTunes]. There are several games available presenting sight word choices and after listening to the word, the student chooses the correct word. The app creates players so progress is saved to each player.

Episode 165: nutrition apps can be used in physical education or health class.

techedge8 techedge9 techedge10

Farm to plate app. The app present a plate illustrating the correct amount of each good group. The student can select the food category to learn more about. Each category describes where vegetables are found, which foods are considered vegetables and why people should eat vegetables. Eat & move-o-matic app demonstrate and matches specific activities to food. When a student selects a type of food, the app suggests several options of burning of that food. In addition, it provides a protip or other suggestions. The final app is the Big Fork, Little Fork app. This app allows children and parents collaborate together to create a healthy food. One section suggests tips to incorporate kids into kitchen. Another section invites parents and kids to cook using the provided recipes. It is children friendly with simple directions and large instructions.

All of these apps and many more can be useful and resourceful in the classroom. Apps can strength and engage student’s learning in any subject, even PE, Art and Music! As more and more school become 1:1 technology to student, teachers would do well to discover and implement apps within their lesson. Good luck and have fun!
iMovie Trailer: Great Depression

Presentations require analysis, organization, responsibility and communication from students. They allow students to teach their fellow students, thus personally reinforcing the material. Students must practice judgment as they focus on the main ideas of a topic to present. They also must practice connecting facts to form and support their points. The current presentation programs are suffice to. PowerPoint, president and google docs. However, what iMovie has that these other programs don’t is movie magic.

imovie5iMovie is an (4.99) app that allows presenters to connect with their audience by engaging and inviting all types of students. It incorporates visual images that represent the topic, background music to support the topic theme and captions to accompany. It provides an artistic opportunity to enhance school topics. Just like a entertaining movie trailer, it draw people in and encourages them to explore further run depth.

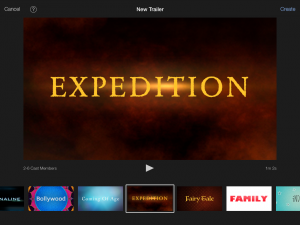
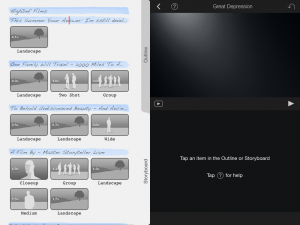
This past week, I created my own movie trailer with the iMovie. And, surprisingly, it was simple and effective. This was the first time I attempted to create a movie so I’ll admit I was nervous. However with the default format and the provided layout it was a piece of cake. To begin, once entering the app, I was questioned whether I wanted to make a movie or trailer. This past week I trie doubt the trailer; however, I will attempt to create a movie late, so stay tuned! So I choose the trailer choice. Immediately, I was presented with several themes to format my movie. iMovie4Each one had specific backdrops, text fonts and music. After selecting one for my Great Depression movie trailer, I was directed to title my movie and create the credits. This supplies the app with potential if the movie was a group project. Next, I was given a form prompting the movie trailer script. The app permitted me ten captions to edit. They were interspersed among thirty pictures. And each picture was designated a defiant time interval. Some were about a second long, others were three seconds. After I filled out my desired captions, which included the introduction, award notification and quotations; I  could insert my pictures and/or videos. The app accessed my photo library. Once I inserted a photo, I could adjust the frame motion. On several pictures, I choose to zoom in which only increased the picture significance. However, my motion was limited to due to time limit. After, adjusting, spell checking my script…I was done! Can you believe it? Literally, four steps. My 1:35 second trailer was done in minutes. Here’s a quick tutorial to guide you through it.

iMovie3 iMovie2 iMovie

This movie app is both teacher and student friendly. Teachers could easily design a movie during heir busy schedule because it was quick and effective. Four steps remember? And students can navigate through the steps because majority of the program is default. Furthermore, iMovie has more freedom  than other presenting programs. It could be used for a variety of assignments, such as: book reports, introductions, concepts/vocabulary, scientific experiments and much more. As I mentioned in the beginning, it integrates  visual images and auditory elements that can strengthen any topic.

Overall, I was impressed by the iMovie app. It allowed me to create a formal yet captivating presentation about a the Great Depression. One reservation I have toward the default program was it didn’t allow me to insert my personal audio. Personally, I wanted to insert the song, man of constant sorrows, to present the emotion of the Great Depression. Still the app was effective, artistic and presentable. I would highly recommend this for in class use by all teachers.  Good luck!

My First Tellagami Project

Technology is enabling society with each new invention. It’s allowing kids to draw without a crayon or paper. It has allowed teenagers to communicate with masses of friends with a single click of a buttons. Technology has now introduced a resource where teachers can instruct and present facts without having stand before the class.  

Tellagami is an (free) application that integrates visual recording with graphic displays. Different from recorded PowerPoint slidesTellagami or embedded voice narration of Prezi, Tellagami provides a virtual character of the teacher. This feature personalizes the message or presentation. It provides a character that audience can see where the message comes from. Furthermore, the character can provide authority and responsibility to the message. 

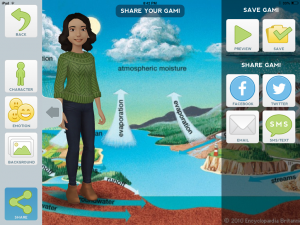
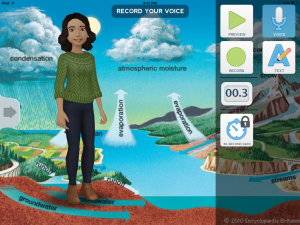
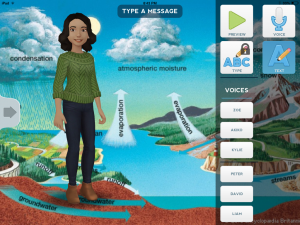
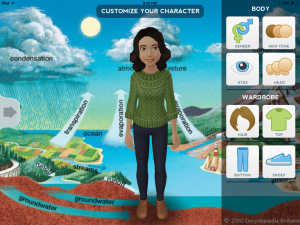
This past week, I tested out the program and created my own Tellagami. I began by opening the application and selecting the tellgami5create option. Next, I was prompted to choose a background. The background was the foundation of the message. For this trial, I choose to introduce the water cycle. So once I selected an image from my photo library, I moved on to tellgami3creating my character. I could personalize her to a certain degree. Because I choose to the free version for this trial, I only had a few options during personalizing. The available alterations included hair, dress, eye color and emotions. Next, I had the freedom to size my character and move her around the background. Last, I recorded my message for the character to say. Once again, the free app was limited during this options. After my recording was complete, the character was synchronized to match my voice. The app added appropriate gestures during my speech.  The process is simple, quick and easy. Here’s a tutorial that directs you through each step.

tellgami5tellgami1

Although this app was simple and quick to create, it was limited in a couple features. I was personally disappointed that I could only insert one background picture. I had to decide on the best picture that represented my entire topic. The water cycle was simple enough to find a picture to that clearly illustrates the concept. But, if I choose to introduce another topic like The Civil War, the search for the perfect picture would have been difficult. Partly because there are so many elements in the Civil War to be represented one picture. So, teachers are limited to certain topics while using this app. One  obstacle that Tellagami presented was it didn’t save the work/video when the creator switched between apps. While I created this, I switched between my photo library and research on the Internet. However, each time I returned to the Tellagami, I lost my recording, my background picture and character position. This was easily fixed; still, it was an inconvenience. Lastly, the Tellagami only permitted thirty seconds of recording. I was using the free version, but even if I upgraded, the recording was only allotted ninety seconds. Personally, I think this allotment is too short for students/teacher to effective presentation. 

tellgami4

In conclusion, this Tellagami app is valuable in and outside the classroom. It allows teachers to follow students home, providing a visual and personal message for countless topics. From topic introductions to research projects, from instructions to definitions and from visual messages to grading or commenting on a homework, Tellagami opens many opportunities for teachers/students to interact.  I will definitely utilize this in my classroom and encourage students to use this for presentations. Here is the website if you want to explore this program further or just need some suggestions. Good Luck!


OSMO in the classroom

The days of simple drawings created by imagination and crayon are fading slowly. Technology has seized the nation as it has made large advancements in both digital and physical aspects. In turn, education strives to keep pace and heartily utilizes every new resource in the classroom.
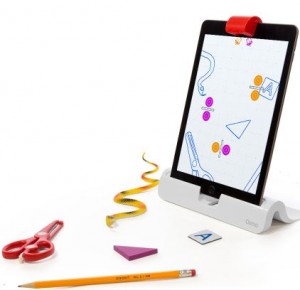
The OSMO program is one of many that benefits and reinforces classroom objectives while engaging and entertaining its users.  Divided into four separate programs activities, OSMO focuses on tactile and visual learners. The four programs, Masterpiece, Tangram, Word and Newton utilizes specific equipment to interact students’ creativity with their learning.

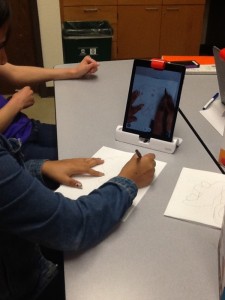
Masterpiece enables hand-eye coordination as the student draw/traces the on-screen picture onto their paper in front of them. By using an iPad and the provided image reflector, the student doesn’t disregard the basic pen and paper drawing. Instead, the two generational elements are combined to transform any student into an artist. Teachers can also exercise this program while teaching handwriting to their class. By changing the on-screen pictures into the alphabet, students will learn how to write their letters . Lastly, the Masterpiece also records the student’s progress as the picture is completed. This component allows students to revisit and review their work after they complete it.

Masterpieceme masterpiece

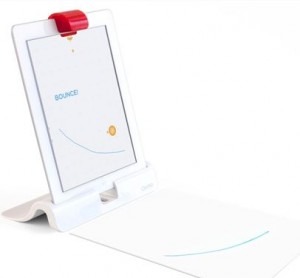
Newton requires students to create a path to guide balls to their target zones. The program displays a screen that has balls falling down to the bottom, missing the zones in which they are supposed to enter. Similar to Masterpiece, the students draw on a paper in front of them to lead the balls to the zones. Students use problem-solving and creativity as they draw the pathway for the balls. As each level gets harder, the students are required to think of more advanced blockades. The game even allows students to place everyday stuff in the area that is reflected on the screen to further guide the balls toward the zones.

newton Newton2

Tangram focuses on combining shapes to create a specific silhouette. Similar to the original Tangram game, the player is given a number of shapes and a specific silhouette to form. This game requires students to try different strategies as they organize the individual shapes in a variety of ways to create the silhouette. Students use trial and error methods and their spatial reasoning to formulate the on-screen silhouette. The technology takes the game one step further as the beginning levels provide hints and shape outlines in the on-screen silhouette. Just like Masterpiece, the student’s progress is recorded, providing visual feedback as they problem-solve through the game’s levels.

tangram2 Tangram

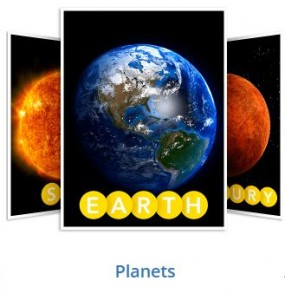
Word requires students to compose a word corresponding to a on-screen picture by using provided letter tiles. Each student is given a set of alphabet tiles, either red or blue. Then once a picture is displayed, they lay their tiles in the reflected area to guess a letter in the hidden word. The reflector recognizes the color and either places the letter in the bubble if it is correct or places it up at the top of the screen if the letter is incorrect. Students utilize their vocabulary and relationship skills to correlate the picture and word together. Furthermore, teachers can program the game to present pictures corresponding to their lesson plan. If the class is learning about the solar system, Word provides a set of planet names to identify.

Word Word2

As you can see, the OSMO program can advance and engage student’s understand in a variety of subjects. Teachers can use these games as centers, homework, classroom activities or even group projects. And unlike other activities, it invites a variety learners, such as visual, tactile and auditory. This program introduces the efficiency of technology, yet retains practical, traditional resources to encourage students’ creativity and problem-solving skills.